I am not a decorator – AT ALL! I have lived in my new home for 5 months now and I am only just now getting around to hanging things on the walls. In fact until Saturday morning – we literally had blue taped blankets and sheets over Anne’s windows instead of hanging curtains!
Well that has all changed. I finally made some decisions and Anne’s room is starting to look more like a little girl lives in there as opposed to a wondering gypsy. I bought some black out curtains from Target for her big window – in fact Anne picked out the color! Here is a link to them. I love the color and I think they will last a good amount of time because of the color. I also found the cutest curtain rods! My bestie Lisa asked me how can curtain rods be cute and I told her she just had to see them.
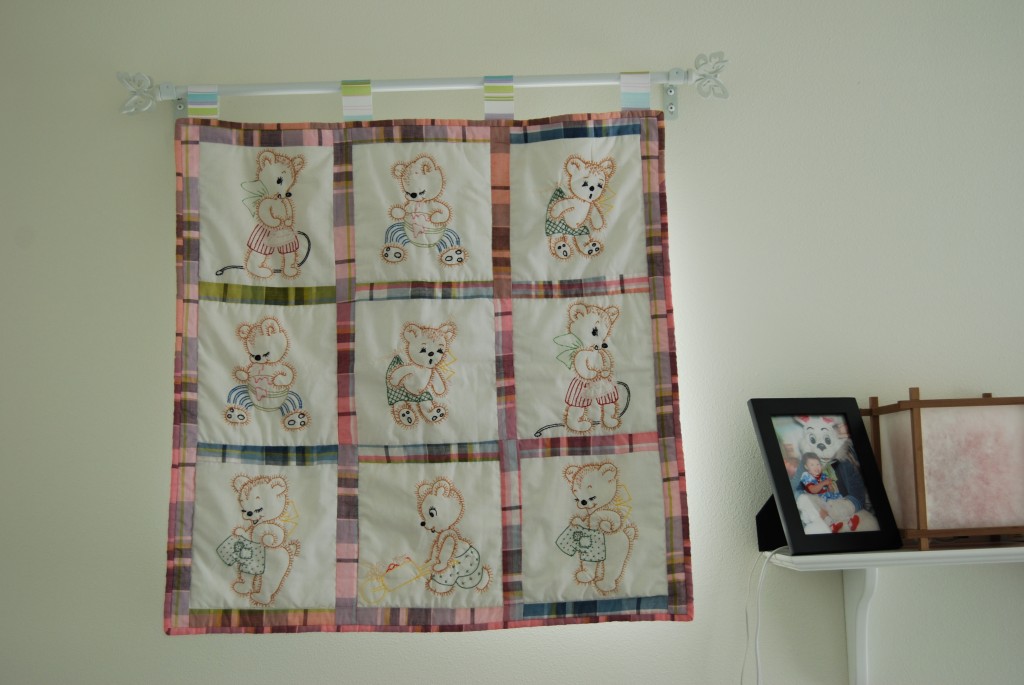
Now the pièce de résistance is what I did for her small window. There is a random 2 ft by 2ft window in her room that needed covering. As soon as I saw it I knew that I wanted to hang a beautiful, yet simple, wall hanging over it but for the life of my I couldn’t figure out how I was going to do it. Well a solution hit me on Thursday morning – I turned it into a black out curtain!
 I didn’t take pictures of what I did to make it a black out curtain, but it is so simple I don’t really think you need them.
You will need:
A wall hanging (this one is quilting and very old)
Coordinating 1″ wide ribbon
Black out curtain lining (any big box fabric store should have it!)
5/8″ Heat n’ Bond fusible tape
Step one – cut your black out lining to be 1/2″ smaller on all sides than your wall hanging
Step two – cut four strips of Heat n’ Bond – same length as black out liner – fuse to black out lining (this may take extra time, I used a teflon pressing sheet to protect both my iron and the lining. The teflon sheet was only $9.00)
Step three – fuse black out liner to back of wall hanging (this serves dual purpose – it will black out light in the room and it will protect the front of the wall hanging from light damage) – this will take awhile – be patient!
Step four – cut lengths of ribbon – this will vary based on the width of your curtain rod and how high you plan on hanging them – measure carefully! You can hand sew these to your wall hanging or you can fuse them with the heat n’ bond tape (that’s what I did).
Step five – hang them up and enjoy!
Anne loved her new curtains and kept pointing at the new one and saying bears.
Hope you had a lovely weekend!

They turned out so cute!!! I love that wall hanging! What a great idea for a window covering. 🙂
Oh yeah… curtain rods can be cute! You were right! I love them! 🙂
How cute! Don’t feel bad about not hanging things on the wall. We repainted our bedroom over 3 years ago and still haven’t rehung the pictures – LOL!
Good post once again. Thumbs up;)
G’Day! Melissa,
Thanks for your thoughts, A tapestry is a work of art that is normally used as a decorative wall hanging to liven up and beautify an otherwise ordinary, if not drab, area or space. The beginnings of these magnificent works of art can be traced as far back as the Hellenistic times. They are manufactured by the interweaving of two kinds of threads, namely warp threads and weft threads. Warp threads are laid out vertically and are stretched from the loom coming from the roller. Weft threats intersect the warp threads horizontally with the aid of the shuttle. These threads are typically made from natural fabric materials, such as cotton, wool and/or silk.
BTW great blogpost