Welcome back for part 2 of the Feathered Star Tutorial – this will be assembly. I have done an all picture tutorial for you – I am a visual learner and for a technique like this I think it will be really helpful. If you are looking for part one (cutting) – go here.
NOTE: ¼” seams are of vital importance for this block. Check that you are using an accurate seam allowance BEFORE you start piecing this block. ALSO! Be sure that you do not stretch the triangles when sewing them.
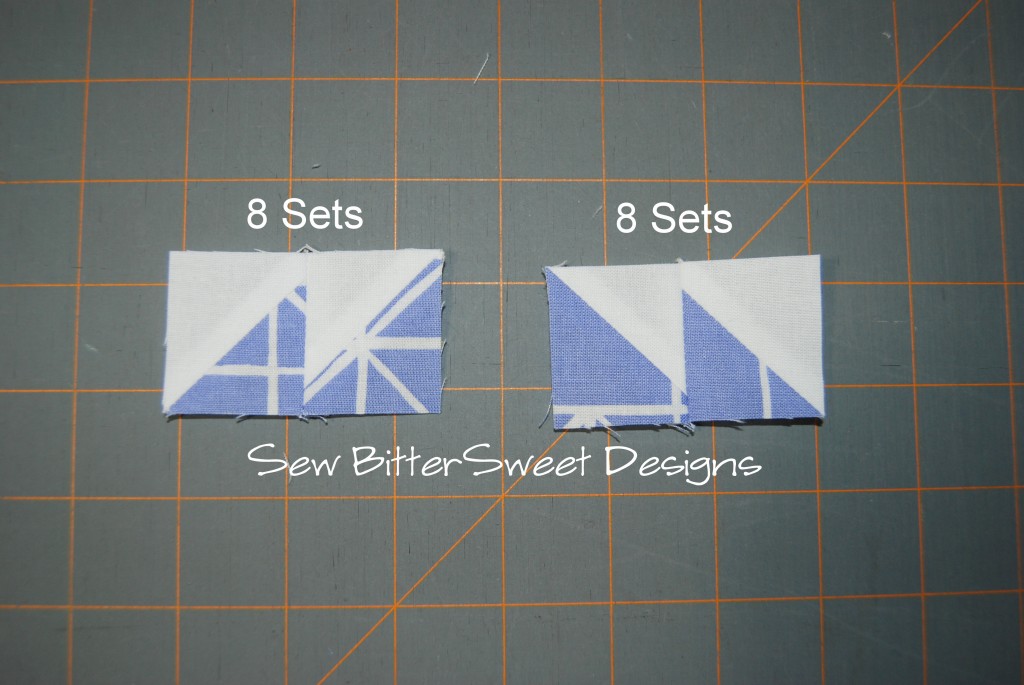
We will start with putting together the HSTs that you made yesterday following the 2 wonderful tutorials I linked to: I recommend chain piecing your pairs together for speed.
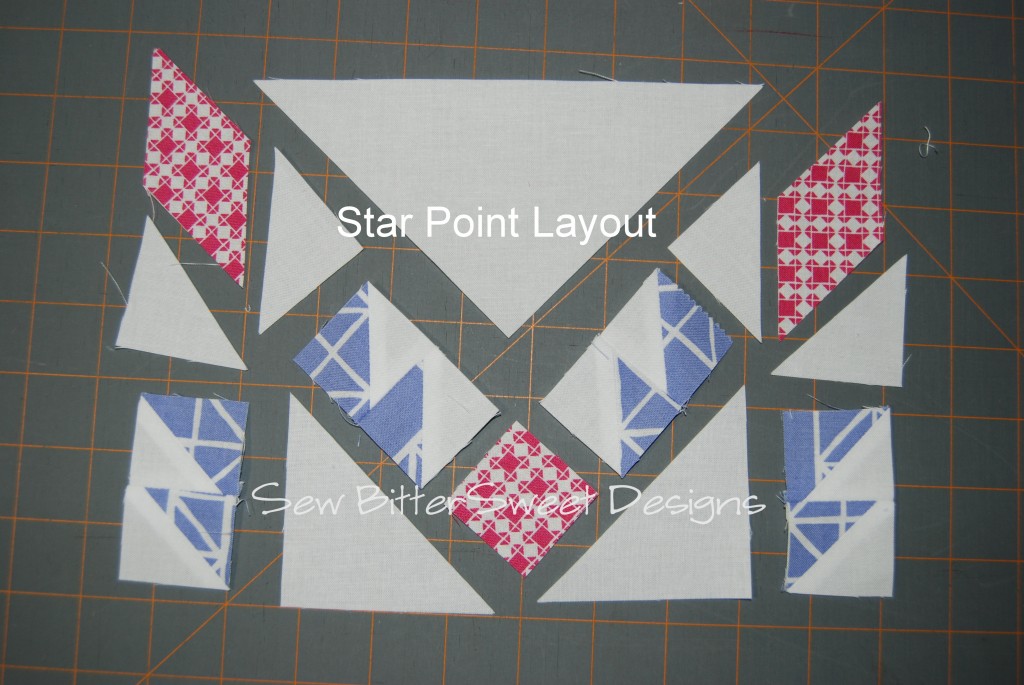
The star points are assembled in pairs. Here is the layout before for each pair, you will make 4 sets.
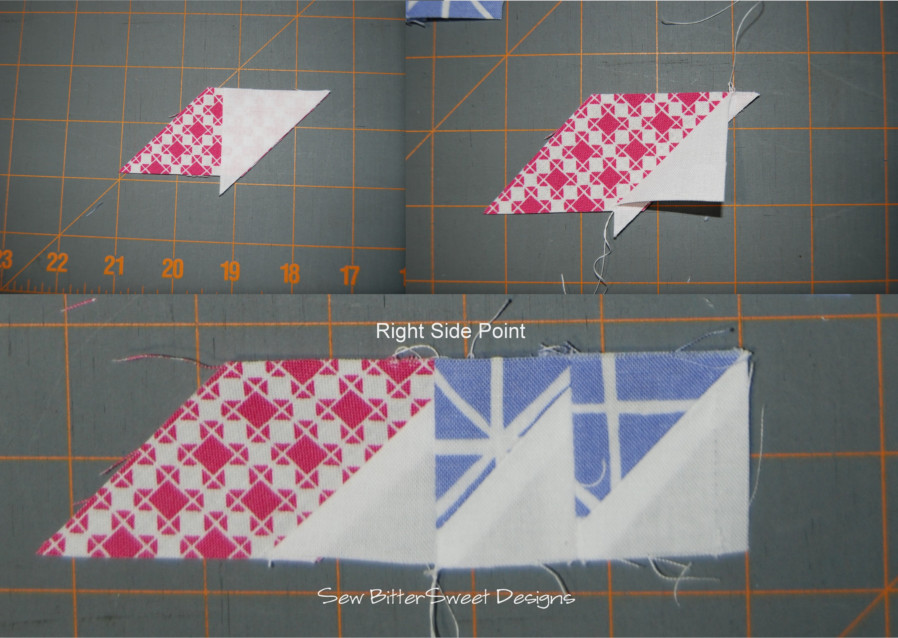
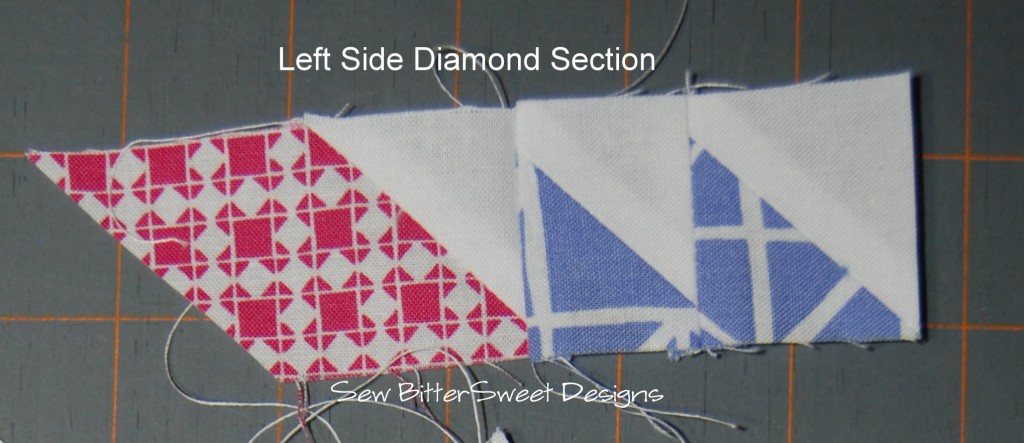
Starting with the right side point, you will assemble the diamond section first:
Assemble the left section the same way, except you will need to reverse the pieces
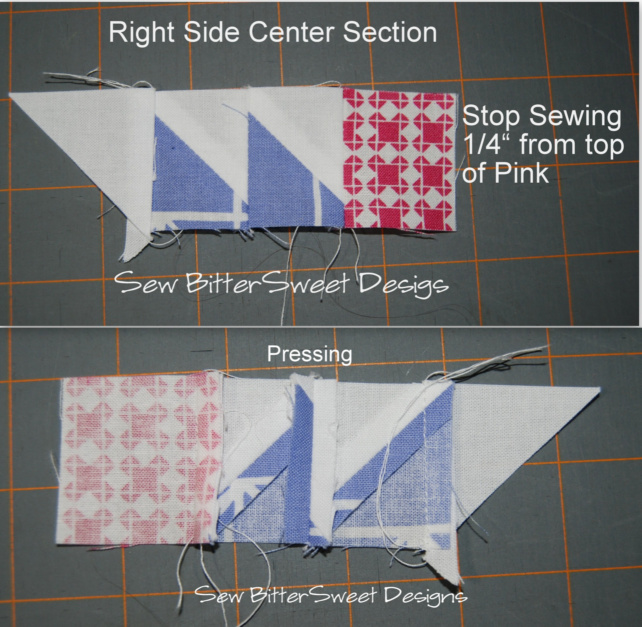
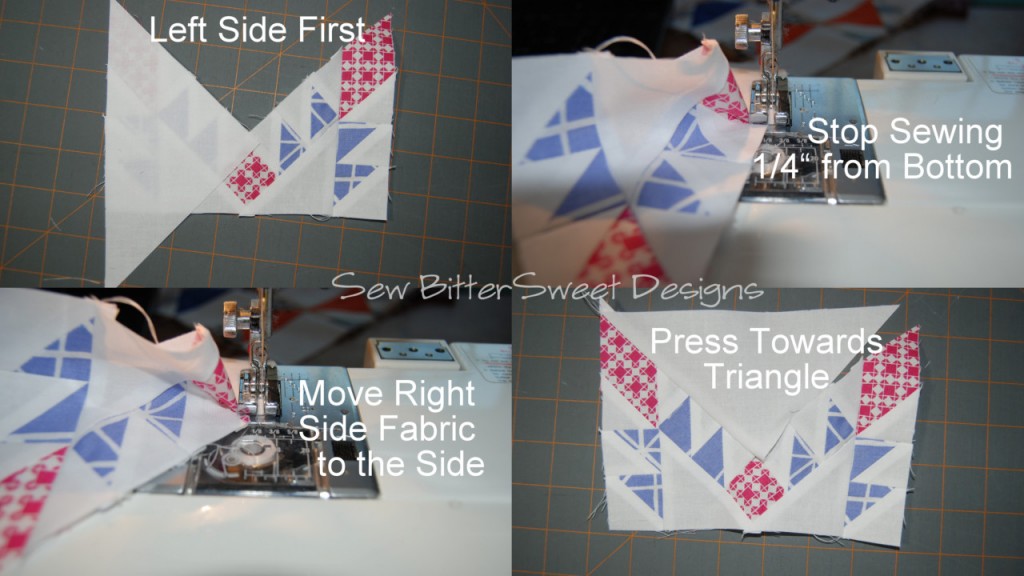
Next assemble the right side center section:
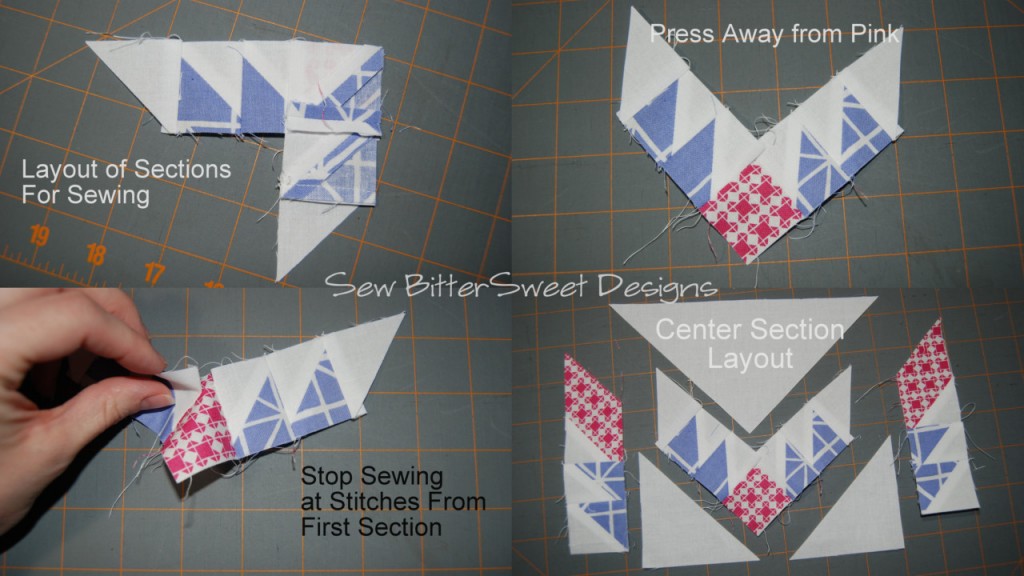
Add left side of center section:
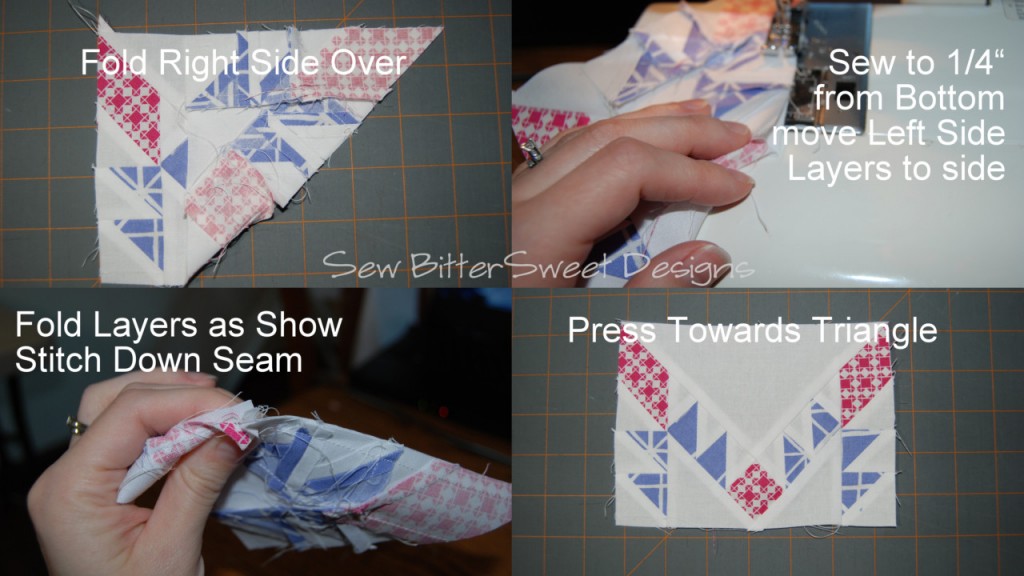
Make sure that you stop sewing at where the sections meet (1/4” from end)
Add inside triangles:
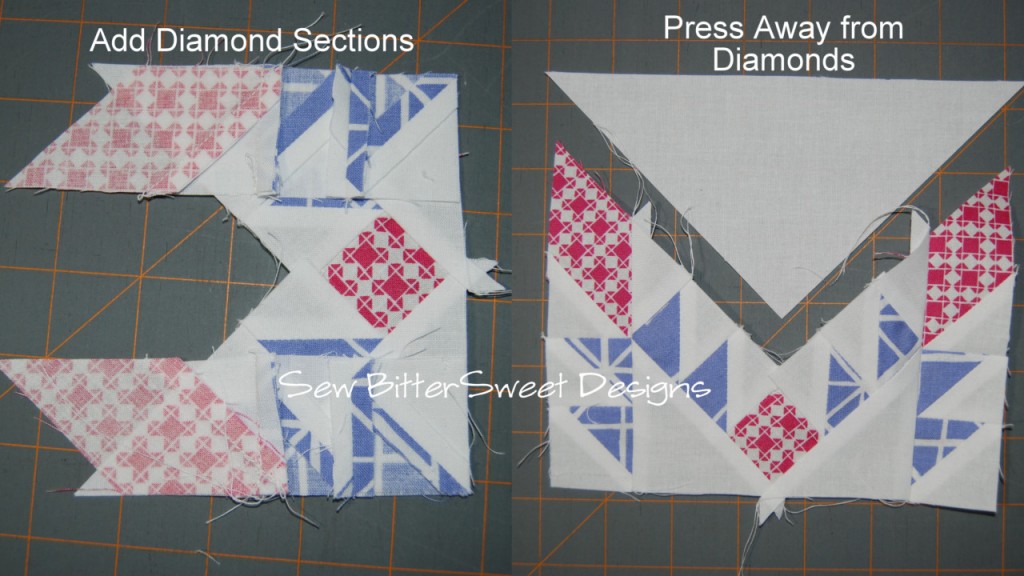
Add diamond sections:
Add top triangle, start with the left side:
Next sew right side:
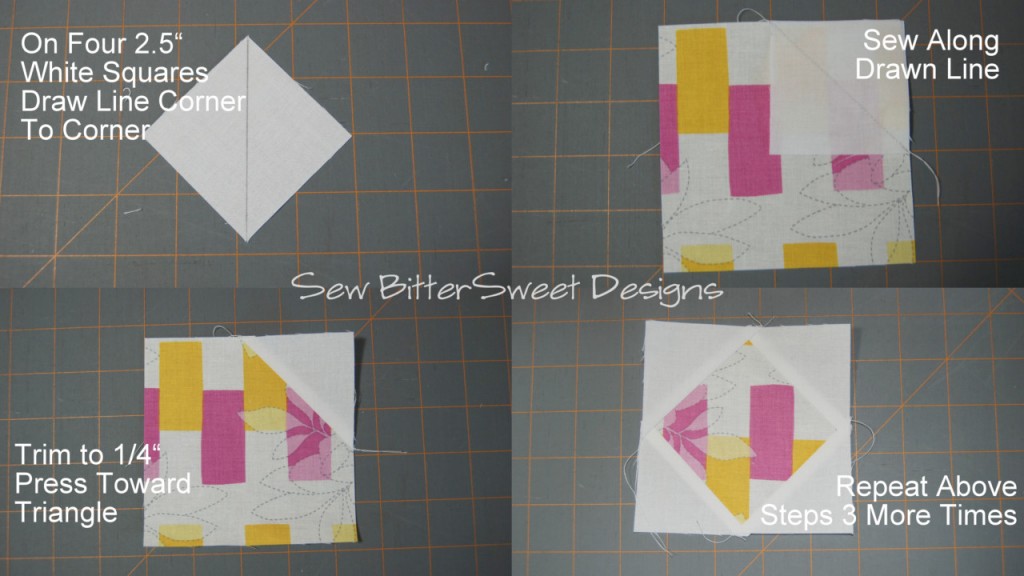
Make center “peekaboo diamond”:
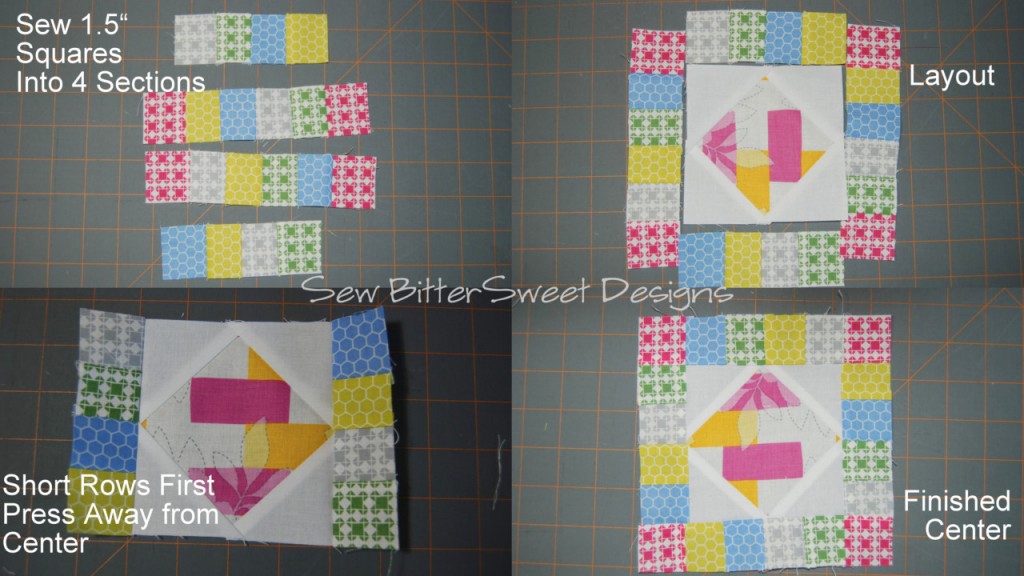
Assemble the border for the center section:
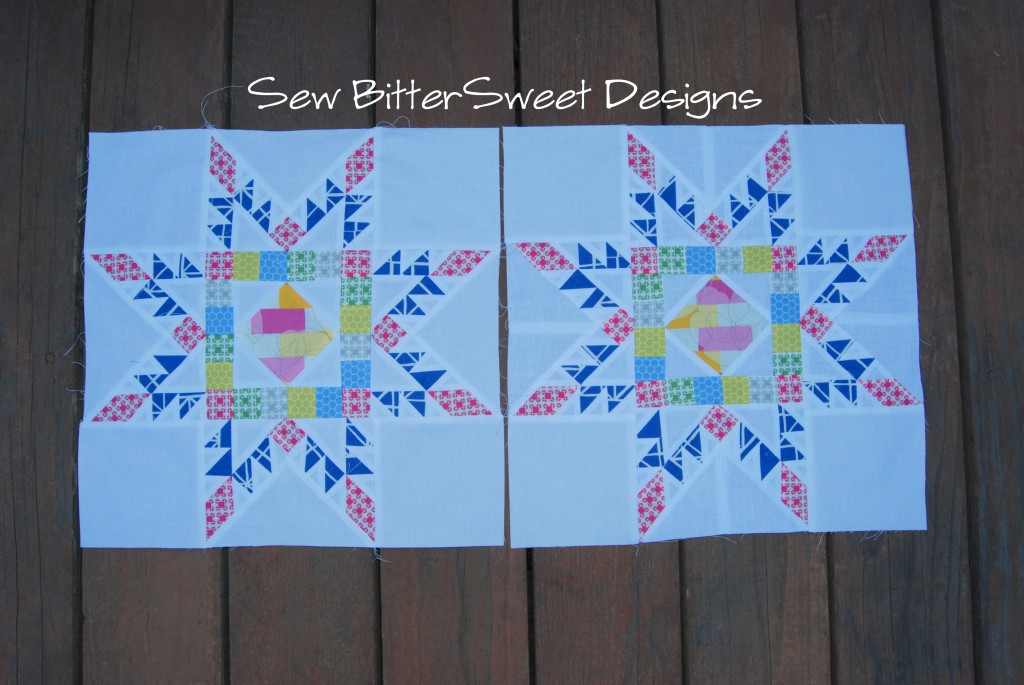
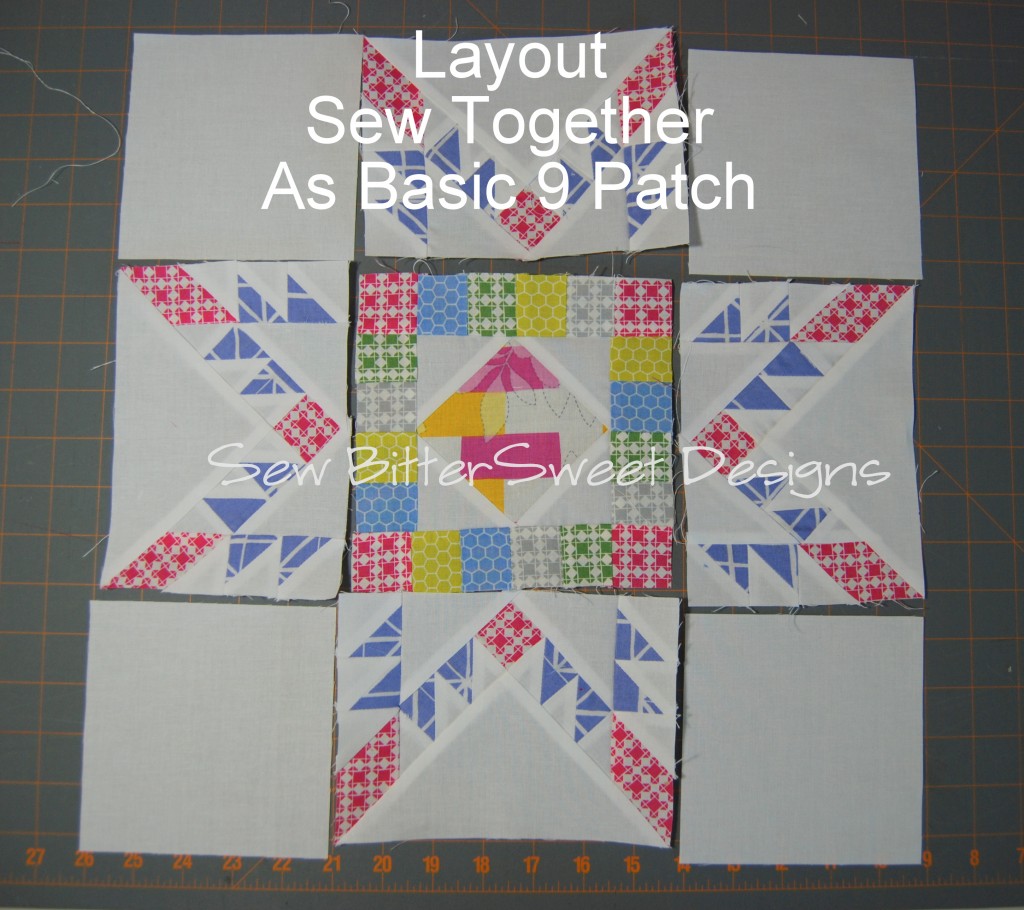
You have now assembled all of the sections – you are ready to layout your block – it is a basic 9 patch now! Sew it up and you are done!!!
The first time I assembled this block it took me 3 days, but keep in mind that I didn’t know what I was doing. I didn’t have a tutorial for the block that I designed, I just went with it. I have now made 3 of these and the third one took me 2 nap times to assemble (that’s about 4 hours total) – 1 nap time to cut, 1 nap time to sew. I measure all my sewing time in nap times 🙂
Good luck and if you make one of these from my tutorial I would love to see it and if you have any questions, please let me know! And don’t forget to enter the Fat Quarter Shop giveaway for a Layer Cake of Quilt Blocks – which is what I am using to make my feathered stars!
![]() I’m linking up to SewHappyGeek Manic Monday and Quilting by the River Tuesday Linky Party.
I’m linking up to SewHappyGeek Manic Monday and Quilting by the River Tuesday Linky Party.


Great tutorial Melissa! Your Feathered Star looks perfect and I love the way you did the center! Pretty soon you’ll get one done in 1nap time! Thanks for sharing!
Quilting at the River Linky Party Tuesday
LOL You bring back memories….measuring progress in nap times! 🙂 Love your tutorial and your blocks!
I really love this block. Thanks for the tutorial!
Thanks for part two of this fun tutorial 🙂
I love the peek-a-boo center and the border squares. Great tutorial. I will have to try this as soon as I have everything else done on my list. 🙂
Great pictures that make it so easy to follow. I love the way the block looks.
That’s a great block, but I think it would take me a lot more that 2 nap times to get it done. Great fabric choices 🙂
this is gorgeous! it’s so detailed, i can’t imagine doing a full quilt of them, but it would be a stunning mini quilt!
Okay, I take back the “making it look easier” comment. Those partial seams scare me.