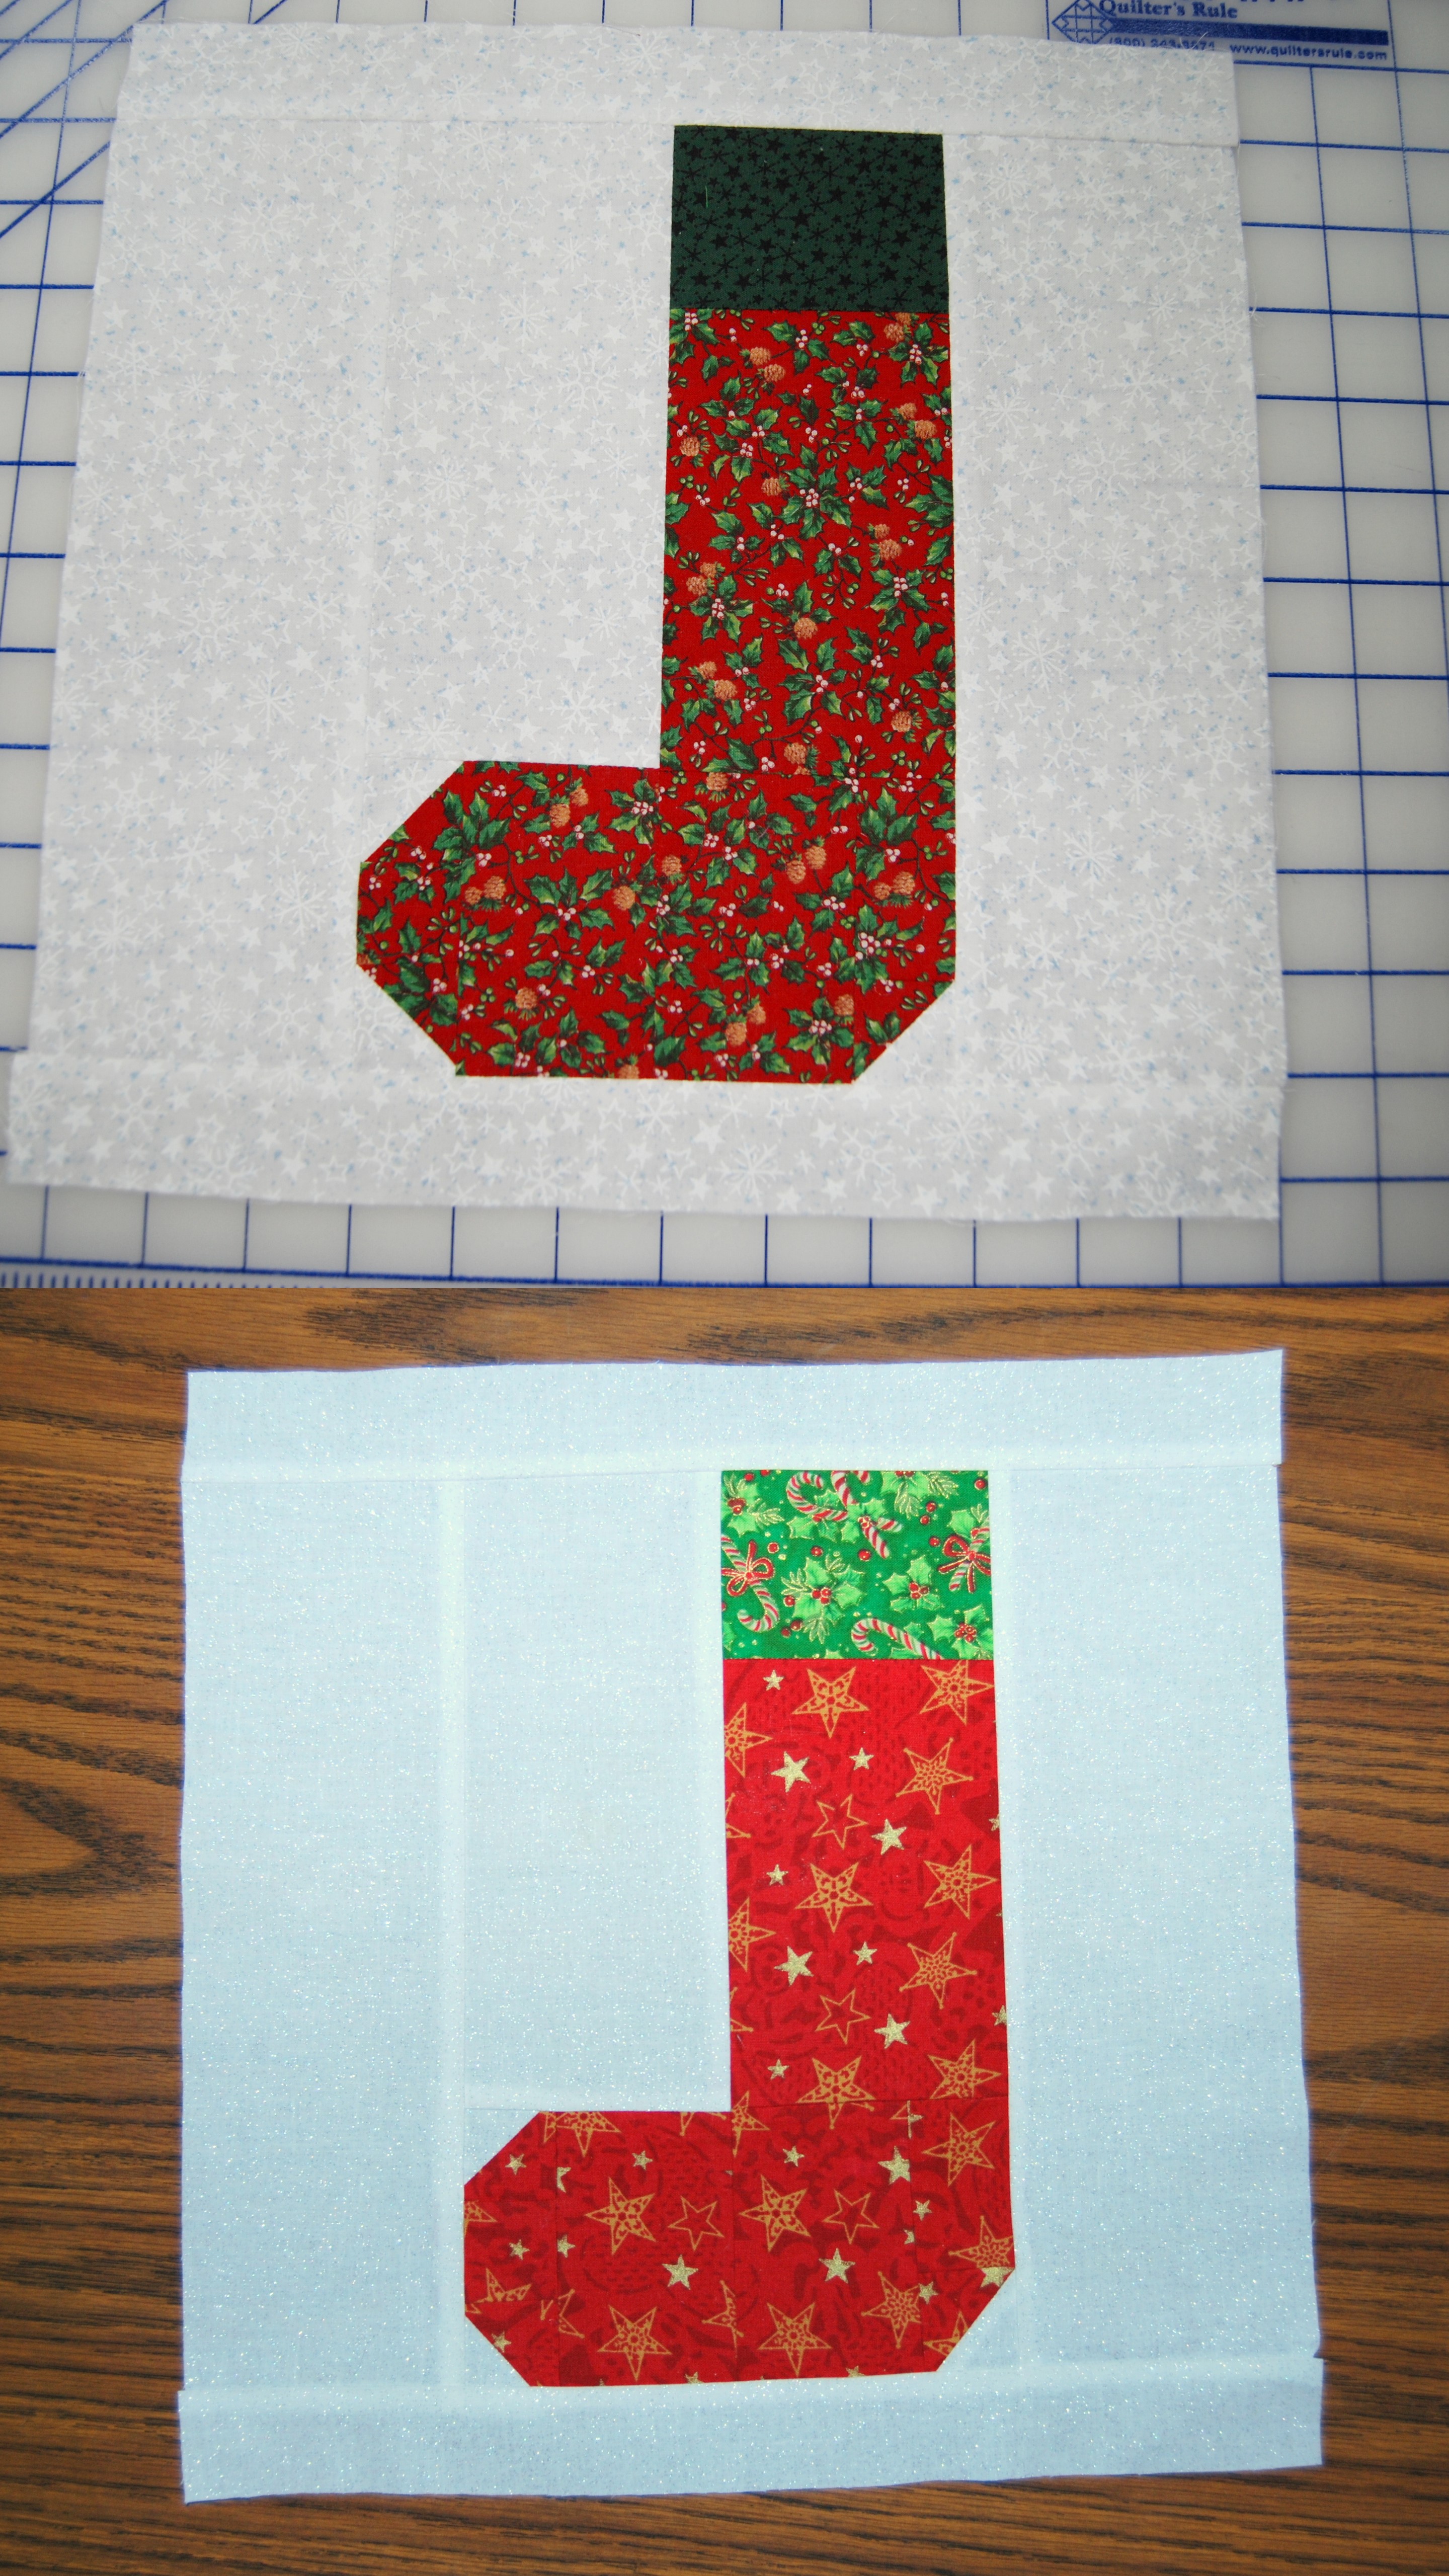
Today I owe a huge thank you to my best friend Lisa. I have known Lisa since we were 11 years old. We lost contact in our early 20’s and found each other again on MySpace in 2007. This past year I got her interested in quilting and she helped me out with this tutorial. I made the stocking block back in July and never took any pictures of how I did it. Last night I sent Lisa a picture of the block with measurements and I talked her through how to make it on the phone and she did a beautiful job – the vintage block is mine and the modern block is hers. Thank you thank you thank you Lisa! You rock!
 This is the final block of the Vintage Christmas Sampler Quilt, if you have made it this far, CONGRATULATIONS! As of this post, all my blocks are completed but I have not finished the top. My plan is to border each block alternating between red and green solid and then sew the blocks together to make the top. I am certain this won’t actually happen until some time next year!
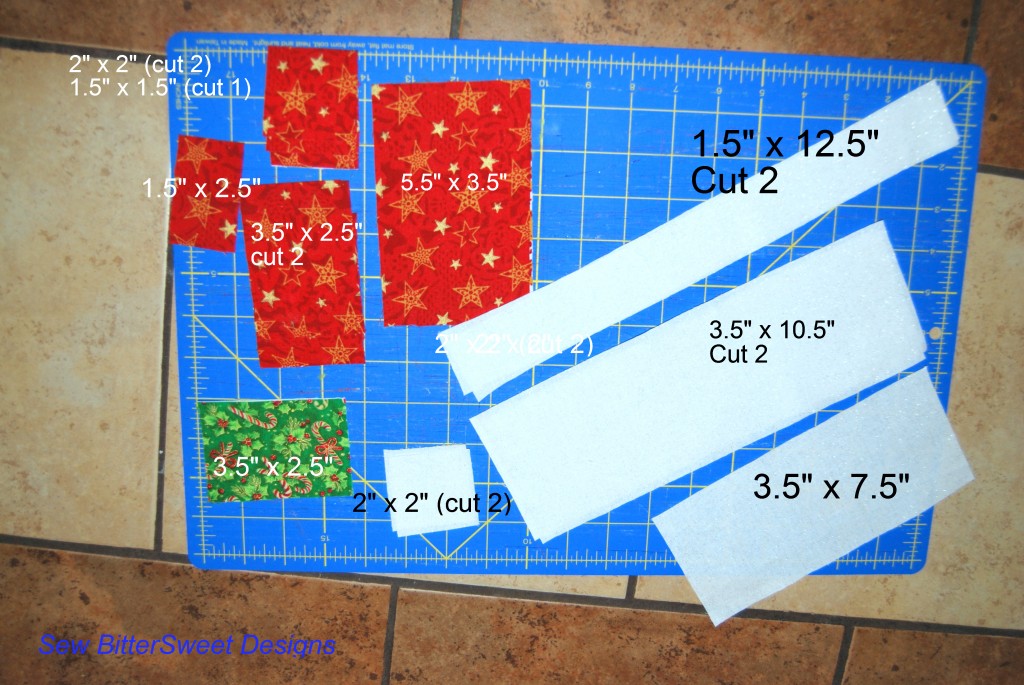
Here we go, cutting:
 From red cut: two 2″ x 2″ squares, one 1.5″ x 1.5″ square, one 1.5″ x 2.5″ rectangle, two 3.5″ x 2.5″ rectangles, and one 5.5″ x 3.5″ rectangle.
From green cut: one 3.5″ x 2.5″ rectangle
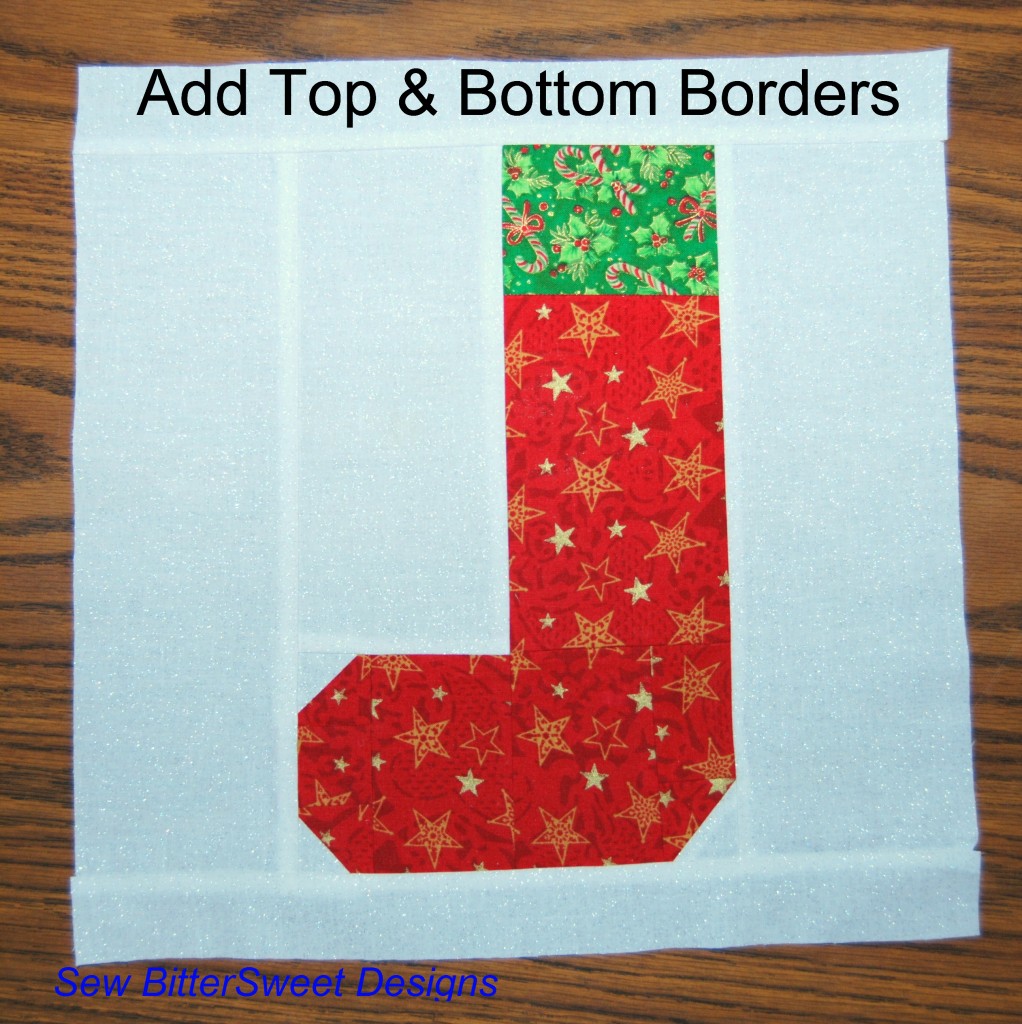
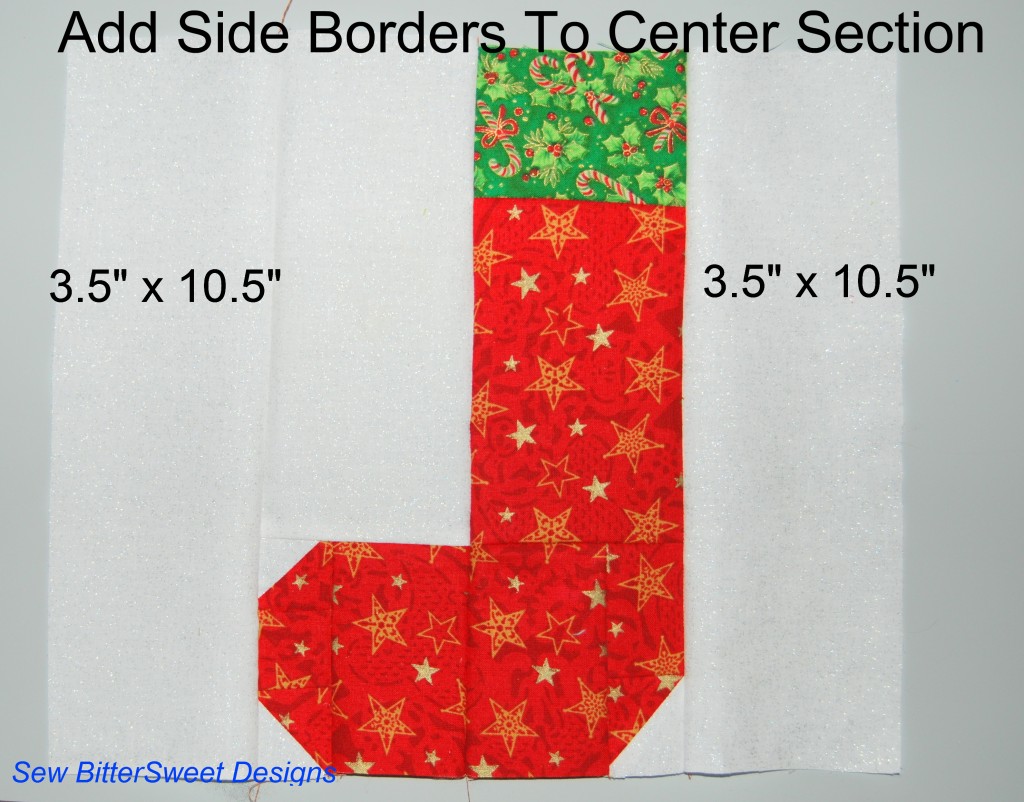
From white cut: two 2″ x 2″ squares, two 1.5″ x 12.5″ rectangles, two 3.5″ x 10.5″ rectangles, and one 3.5″ x 7.5″ rectangle.
NOTE: all seams are 1/4″
Next, using the red and white 2″ squares assemble your Half Square Triangles (HSTs) – trim them down to 1.5″ x 1.5″
Next, assemble toe section:
 Next, assemble center section of block:
 Congratulations! Another finished block! If you are like me and this is your last block then you have finished all the blocks for your quilt!
As soon as I finish the quilt top I will post pictures – this will not be until sometime next year, but I am really excited to get it done. This is the 4th quilt that I have designed and I am really excited about it. I would also love it if you are making this quilt and you want to share you pictures with me!
Happy Sewing!
![]() NOTE: Don’t forget, I am one of the bloggers who is going to lose Google Friend Connect in March 2012, please take a moment and follow me via Bloglovin’, Facebook, RSS or networked blogs. You are important to me and I want to be able to stay in contact with you! Check my side bar for all the best ways to stay in touch after GFC goes bye bye!
NOTE: Don’t forget, I am one of the bloggers who is going to lose Google Friend Connect in March 2012, please take a moment and follow me via Bloglovin’, Facebook, RSS or networked blogs. You are important to me and I want to be able to stay in contact with you! Check my side bar for all the best ways to stay in touch after GFC goes bye bye!


Great tutorial! I hadn’t realised the toe & heel had little HSTs. It’s neat that your friend was able to recreate this & help you. I think your plan of alternating red & green around the blocks will look really nice. I’m just going to use white 2″ sashing and a red binding. Last night I started sewing up the blocks, and I got the Ohio Star Variation (my first time doing QSTs), Radiating Diamonds, and Geese in Formation (also my first time doing geese) done. I had no problems with the blocks, and the QSTs and geese were so easy, thanks to your tutorials. I’ll be sewing up more blocks today. This will be my first “real” quilt to get completed, and I’m really excited.
I am SO happy that I was able to help you with this. Gave me just the kick in the pants I needed to try out HSTs finally! You are such a sweetheart! You are very welcome!!! Let me know if you ever need a block made again. 🙂
NICE job on your block, Lisa!!! 🙂
Thanks Brandy! 🙂
What a cute stocking and great tutorial! Now teaching a tutorial over the phone is a new one!
She is a great teacher for sure. Had to have the order of assembly right so she could write the tutorial the way she had done it. 🙂